Let me tell you about the day I almost burned the butter and it changed my life. I was following a standard cookie recipe, got distracted by a text (you know how it is), and looked over to see my melted butter foaming and sputtering, with little brown specks sinking to the bottom. My first thought was, “Oh, great. I ruined it.” But then I smelled it. It smelled like… toffee. And hazelnuts. And heaven. I took a gamble, poured it into the dough, and baked them off. Friends, what emerged from my oven was not a mistake. It was a religious experience. The cookies had this deep, complex, almost caramel-like flavor that made a normal chocolate chip cookie taste… well, bland. This recipe is that happy accident, perfected. It requires one extra step and a little patience, but I promise you, it will ruin all other cookies for you. Forever.
🎯 QUICK FACTS TABLE
| Prep Time | Cook Time | Total Time | Servings | Difficulty |
|---|---|---|---|---|
| 25 minutes + 1 hr chill | 10-12 minutes | 1.5 hours + | 12-14 large cookies | Worth the Effort |
📝 INGREDIENTS SECTION
For the Brown Butter (The Star):
- 1 cup (2 sticks) unsalted butter (you’ll end up using slightly less, but this accounts for loss)
- 1 ice cube (trust me on this!)
For the Cookie Dough:
- 2 ¼ cups all-purpose flour (spooned and leveled!)
- 1 tsp baking soda
- 1 ½ tsp cornstarch (the chewiness guardian)
- ½ tsp salt
- 1 cup packed dark brown sugar (this pairs SO well with the brown butter)
- ½ cup granulated sugar
- 2 large eggs, room temp
- 2 tsp vanilla extract (or use 1 tsp vanilla bean paste for extra specks of glory)
The Main Event:
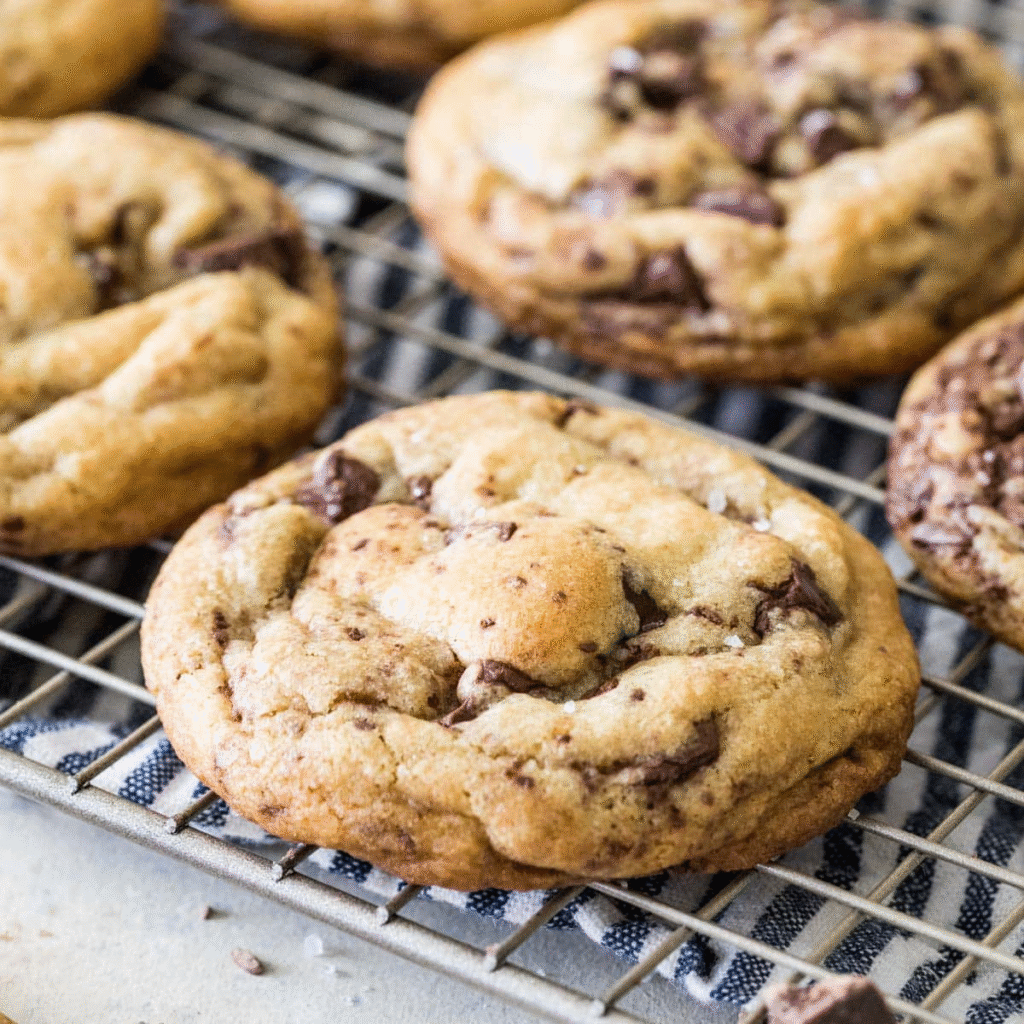
- 1 ½ cups semi-sweet chocolate chunks or high-quality chocolate chips (chunks create amazing pools)
- Flaky sea salt, for sprinkling (just before baking—this is NON-NEGOTIABLE)
👩🍳 HOW TO COOK!
- The Brown Butter Transformation: Cut the butter into tablespoons and melt it in a light-colored saucepan over medium heat. It will foam, crackle, and then the crackling will subside. Swirl the pan constantly. Soon, you’ll see little golden-brown specks at the bottom. Smell for that nutty aroma. The second it smells toasty, take it off the heat and pour it into a heatproof bowl, making sure to get all those brown bits (the “browned milk solids”—aka FLAVOR). Immediately add the ice cube and stir until melted. This stops the cooking and replaces some of the water lost. Let it cool for 15 minutes.
- The Dough Dance: Whisk the flour, baking soda, cornstarch, and salt together in a medium bowl. In a large bowl, whisk the cooled brown butter, brown sugar, and granulated sugar together for a good minute. It might look a little separated, that’s okay. Whisk in the eggs one at a time, then the vanilla. Switch to a spatula and gently fold in the dry ingredients until just combined. Be gentle! Fold in the chocolate chunks.
- The Mandatory Chill (This is a Hill I Will Die On): Cover the bowl and CHILL THE DOUGH for at least 1 hour, and up to 72 hours. This is not optional. The brown butter needs to re-solidify, and the flour needs to hydrate. This prevents a greasy, flat cookie and gives you that perfect, thick, and chewy texture.
- The Scoop & Rest: Preheat your oven to 350°F (175°C). Line a baking sheet with parchment paper. Scoop the dough into large, 3-tablespoon-sized balls. Place them on the sheet and let them sit at room temp for about 10-15 minutes while the oven preheats. This takes the deep chill off so they bake evenly.
- The Bake & The Salt: Bake for 10-12 minutes. The edges will be set and golden, but the centers will look soft and puffy. They will look underbaked. THIS IS CORRECT. As soon as you pull them out of the oven, aggressively tap the pan on the stove top to deflate them slightly and create those beautiful craggy wrinkles. While they’re still piping hot, sprinkle each one with a pinch of flaky sea salt. Let them cool on the baking sheet for 10 full minutes before moving them. They are incredibly fragile until they set.
📊 NUTRITION & TIPS
Pro-Tips Section: Little Tweaks, Big Results:
- [Time Saver] Brown the butter the night before and let it cool/solidify in the fridge. The next day, it’s ready to go and your dough will come together in minutes.
- [Essential Technique Tip] The single most important step is browning the butter correctly. Use a light-colored pan so you can see the color change. And don’t walk away! It goes from perfectly nutty to burnt in seconds. The ice cube is a genius trick to quickly cool it and add back moisture. Also, the sea salt at the end isn’t just for looks; it cuts the sweetness and makes the chocolate flavor pop like crazy.
❓ READERS ASKED, WE ANSWERED
Q: My brown butter is separated and looks weird. Did I mess up?
A: Nope! You did it perfectly. Browning the butter cooks out the water, which can cause the fat and milk solids to separate, especially when you cool it. It might look a little grainy or clumpy when you mix it with the sugars. This is totally normal and will all come together once you add the eggs and flour. You’re on the right track!