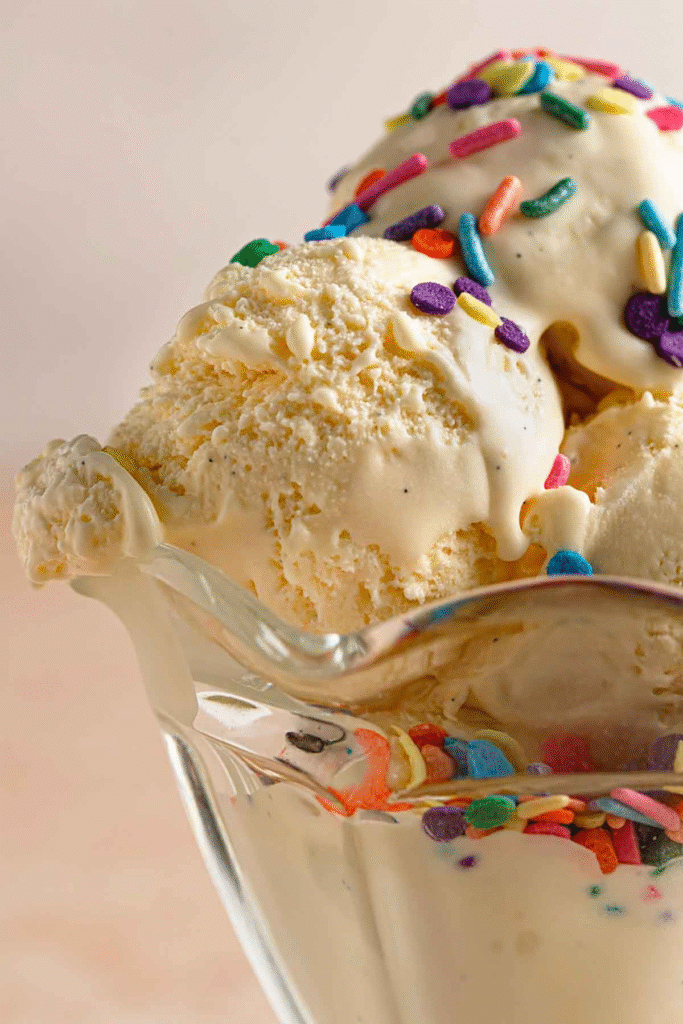
Let’s get one thing straight right now. This isn’t that icy, airy, vaguely sweet stuff from a cardboard carton. This is ice cream. The kind that feels like a luxurious, frozen hug. The kind that’s so rich and creamy it almost has a slight chew to it. This is custard-style ice cream, which means we’re using egg yolks to create an unbelievably smooth, dense, and velvety texture. Yeah, it takes a little more effort than a “dump-and-churn” recipe, but the difference is like night and day. The first time I made this, I tasted the base before it even went into the machine and my eyes literally rolled back in my head. It tastes like pure, unadulterated vanilla joy. It’s the perfect blank canvas, but honestly? It’s a masterpiece all on its own. This is the recipe that will make you an ice cream snob, and you’ll thank me for it.
🎯 QUICK FACTS TABLE
| Prep Time | Cook Time | Total Time | Servings | Difficulty |
|---|---|---|---|---|
| 25 minutes + 4+ hrs chill | 15 minutes | 5+ hours (including churning/freezing) | About 1 Quart | A Labor of Love |
📝 INGREDIENTS SECTION
The Creamy Foundation:
- 2 cups heavy cream
- 1 cup whole milk (don’t you dare use skim)
- ⅔ cup granulated sugar
- ⅛ tsp fine sea salt (just a pinch to make the flavors pop!)
The Custard Base (The Heart of the Matter):
- 6 large egg yolks (save the whites for meringues!)
- ¼ cup granulated sugar (this is for the yolks)
The Star of the Show:
- 1 whole vanilla bean, split and scraped (OR 1 tbsp high-quality vanilla bean paste) (This is where the magic is, don’t cheap out!)
👩🍳 HOW TO COOK!
- The Infusion (Making Vanilla Perfume): In a medium saucepan, combine the cream, milk, the ⅔ cup of sugar, and the salt. Add the scraped vanilla bean seeds and the empty pod right into the pot. Heat it over medium heat, stirring occasionally, until it’s just barely simmering—you’ll see tiny bubbles form around the edges. Take it off the heat, cover it, and let it steep for 30 minutes. This builds an incredible depth of flavor.
- The Tempering Tango (Don’t Scramble Those Eggs!): In a separate medium bowl, whisk the egg yolks and the remaining ¼ cup sugar together until the mixture is pale, thick, and falls from the whisk in a “ribbon.” This takes a couple of minutes. Now, here’s the scary part. Slowly, and I mean SLOWLY, drizzle about 1 cup of the warm cream mixture into the egg yolks while whisking constantly. This is called tempering, and it gently brings the eggs up to temperature without making sweet vanilla scrambled eggs.
- The Cook & The Coating: Pour the now-tempered egg mixture back into the saucepan with the remaining cream. Cook over low heat, stirring constantly and scraping the bottom with a spatula, until the mixture thickens enough to “coat the back of a spoon.” You should be able to run your finger across the spoon and have the line hold. This is the “nappe” stage and should read about 170-175°F on a thermometer. DO NOT BOIL.
- The Strain & The Chill: Immediately strain the custard through a fine-mesh sieve into a clean bowl to remove any little cooked egg bits and the spent vanilla bean pod. Press a piece of plastic wrap directly onto the surface to prevent a skin from forming. Chill this custard base for at least 4 hours, but overnight is best. It needs to be completely, utterly cold. Patience is a virtue here.
- The Churn & The Ripen: Pour the frigid custard into your ice cream maker and churn according to the manufacturer’s instructions. It will look like soft-serve. Transfer it to a loaf pan or airtight container, press more plastic wrap on the surface, and freeze for at least 4 hours to “ripen” and firm up. This is the final step to that perfect, scoopable texture.
📊 NUTRITION & TIPS
Pro-Tips Section: Little Tweaks, Big Results:
- [Time Saver] You can make the custard base up to 3 days in advance! Just keep it tightly covered in the fridge. The actual churning and freezing day is a breeze.
- [Essential Technique Tip] The two most critical steps are tempering the eggs slowly to avoid curdling, and cooking the custard just until it coats the spoon. If you undercook it, it won’t be thick enough. If you overcook it, it can become grainy. Trust the coating test! Also, a pinch of salt isn’t optional—it makes the vanilla flavor sing.
❓ READERS ASKED, WE ANSWERED
Q: My ice cream is rock hard! How do I fix it?
A: Ah, the classic homemade ice cream problem! Custard-based ice creams freeze harder than store-bought because they don’t have stabilizers and gums. The best fix is prevention: a tablespoon of vodka or a liqueur added right before churning works wonders without affecting flavor. To serve rock-hard ice cream, just let it sit on the counter for 10-15 minutes before scooping. It’ll be perfect!