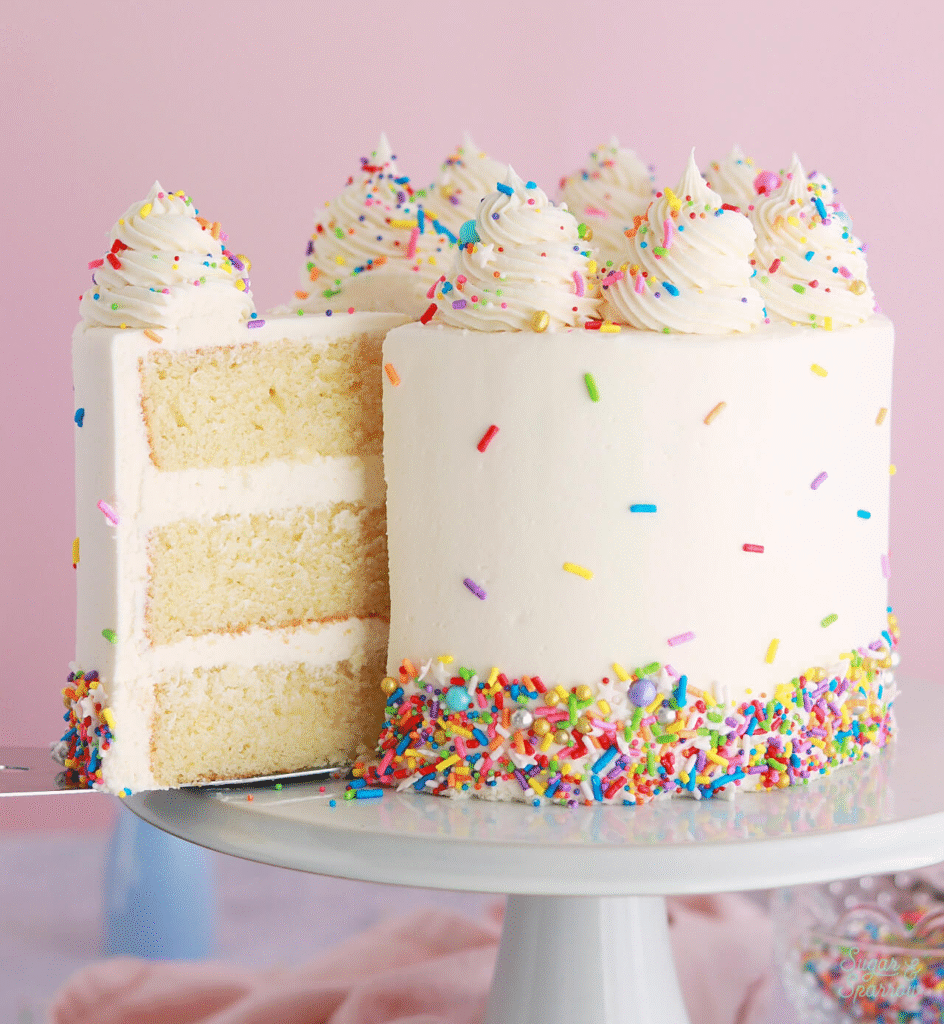
I have a confession. For years, I was terrified of making a classic vanilla cake from scratch. They always seemed so… basic. And basic is hard! A box mix is forgiving. A scratch cake? It can be dry. Or dense. Or bland. But then I cracked the code, and let me tell you, the look on my kid’s face when he took a bite of this cake was worth every single failed attempt. This isn’t just a vanilla cake. It’s a masterpiece of fluffiness and flavor. We’re using both butter AND oil for ultimate moisture, and real vanilla bean paste for those gorgeous little specks that just scream “I’m homemade!” (I also may have licked the beaters and felt like a kid again myself.) This is the cake you make for the people you love most. It’s the cake that says “Happy Birthday” louder than any store-bought card ever could.
🎯 QUICK FACTS TABLE
| Prep Time | Cook Time | Total Time | Servings | Difficulty |
|---|---|---|---|---|
| 30 minutes | 25-30 minutes | 2 hours (with cooling) | 12-14 | A Labor of Love |
📝 INGREDIENTS SECTION
For the Vanilla Cake:
- 2 ½ cups all-purpose flour (spooned and leveled!)
- 2 cups granulated sugar
- 1 tbsp baking powder
- 1 tsp salt
- 1 cup (2 sticks) unsalted butter, softened (but not melty!)
- ½ cup neutral oil, like vegetable or canola (this is the SECRET to a moist crumb!)
- 4 large eggs, room temp (I know, but it matters!)
- 1 tbsp vanilla bean paste or high-quality extract (don’t be shy!)
- 1 cup whole milk, room temp
For the Classic Vanilla Buttercream:
- 2 cups (4 sticks) unsalted butter, softened
- 5-6 cups powdered sugar, sifted
- 2 tbsp vanilla bean paste or extract
- 3-4 tbsp heavy cream or milk
- Pinch of salt
- For Decorating: Rainbow sprinkles!
👩🍳 HOW TO COOK!
- The Prep Work (The “Set Yourself Up for Success” Step): Preheat your oven to 350°F (175°C). Grease and flour two 9-inch round cake pans, and line the bottoms with parchment paper rounds. This is your insurance policy against stuck cakes. I don’t care how non-stick your pans are, JUST DO IT.
- The “Reverse Creaming” Method (The Secret to a Fine Crumb): In the bowl of a stand mixer fitted with the paddle attachment, whisk together the flour, sugar, baking powder, and salt. With the mixer on low, add the softened butter one tablespoon at a time. Then, drizzle in the oil. Mix until the mixture looks like wet sand. This coats the flour in fat and minimizes gluten development, which equals a super tender, soft cake.
- The Wet Ingredient Merge: In a separate bowl or large measuring cup, whisk together the eggs, vanilla, and milk. With the mixer on medium-low, slowly pour the wet ingredients into the dry. Mix for a good 60-90 seconds until the batter is smooth, pale, and beautifully silky. Scrape the bowl halfway through! Don’t overmix, but make sure it’s fully combined.
- The Bake & The Cool (Patience is a Virtue!): Divide the batter evenly between your prepared pans. Bake for 25-30 minutes, until a toothpick inserted in the center comes out clean. The tops should be golden and the cake should spring back when lightly touched. Let the cakes cool in the pans for 15 minutes, then run a knife around the edge and invert them onto a wire rack to cool completely. I mean COMPLETELY. Warm cake + buttercream = a melty, slidey mess.
- The Frosting Fluff & The Build: While the cakes cool, make the buttercream. Beat the softened butter on medium-high until it’s pale and fluffy—about 5 minutes. Gradually add the sifted powdered sugar, one cup at a time, on low speed. Once incorporated, add the vanilla and salt. Beat on high for 3 full minutes until it’s wildly light and fluffy. Add the cream, one tablespoon at a time, until it’s your desired spreading consistency.
- To assemble: Place one cake layer on a plate. Spread a thick layer of frosting on top. Place the second layer on top. Apply a thin “crumb coat” of frosting over the entire cake and chill for 15 minutes. This traps any loose crumbs. Then, pile on the rest of the frosting, decorate with a blizzard of sprinkles, and stand back to admire your work.
📊 NUTRITION & TIPS
Pro-Tips Section: Little Tweaks, Big Results:
- [Time Saver] You can bake the cake layers a day ahead! Once completely cool, wrap them tightly in plastic wrap and store at room temp. Frosting a cold cake is actually easier.
- [Essential Technique Tip] The #1 secret to a level, non-domed cake is using bake-even strips (wet fabric strips you wrap around the pan). If you don’t have them, just cut the dome off the cooled layers with a serrated knife to create a flat surface. Also, for the love of all that is holy, make sure your ingredients are at room temperature. It ensures everything emulsifies properly for the best texture.
❓ READERS ASKED, WE ANSWERED
Q: Can I use all butter instead of butter and oil?
A: You can, but I don’t recommend it. Butter provides flavor, but oil provides moisture that stays for days. An all-butter cake can be drier and a bit more dense. The combination here gives you the best of both worlds: incredible buttery flavor with an unbelievably moist, tender crumb that won’t dry out. Trust the mix!