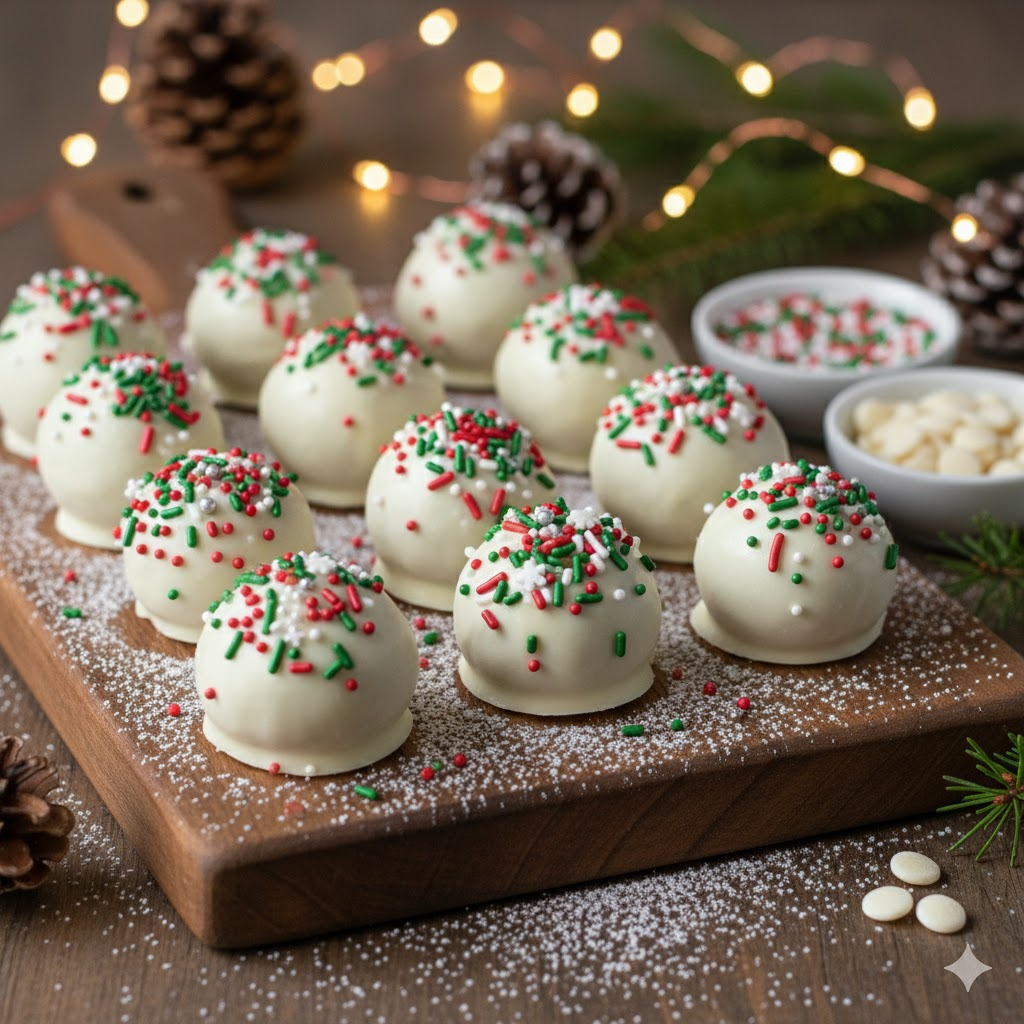
👋 Okay, stop the presses! Seriously, if you’re looking for the easiest, most adorable, melt-in-your-mouth holiday treat that requires absolutely ZERO oven time, then you have officially found your holy grail. These Sugar Cookie Truffles? They are pure, unadulterated, bite-sized bliss, and they taste exactly like a dreamy sugar cookie but in a super fudgy, decadent truffle form. The first time I whipped these up, I was in a panic. My friend’s annual cookie exchange was in an hour, I’d completely forgotten to bake, and I had, like, a box of store-bought sugar cookies just staring at me. A moment of genius (or pure desperation) struck! Thirty minutes later, I had these gorgeous truffles, and they were the first thing to disappear off the dessert table. People were literally begging for the recipe! They’re creamy, they’re sweet, they’re customizable, and honestly, they’re so simple, it almost feels like cheating. But hey, in the chaos of the holidays, who doesn’t love a little delicious cheat code? Get ready to spread some serious, no-bake holiday cheer!
🎯 QUICK FACTS TABLE | Category | Details | | :———— | :—————————————— | | Prep Time | 20 minutes (active) | | Chill Time| 1 hour + 30 minutes | | Total Time| 1 hour 50 minutes | | Servings | About 24-30 truffles | | Difficulty| Super Easy (Seriously, anyone can do this!) |
📝 INGREDIENTS SECTION
For the Dreamy Sugar Cookie Base:
- 1 (10-ounce) package store-bought sugar cookies (The plain, crunchy kind! Entenmann’s, Pecan Sandies work great too if you can’t find sugar cookies, just adjust sweetness slightly!)
- 4 ounces (½ block) cream cheese, softened (Philadelphia, please! Don’t skimp on quality here.)
- ½ cup powdered sugar (Sifted if you’re feeling fancy, but not strictly necessary!)
- 1 teaspoon vanilla extract (Pure vanilla, always, for that authentic cookie flavor!)
- Pinch of salt (Just a tiny pinch to make everything pop!)
For the Festive Coating & Decorations:
- 12 ounces white melting wafers or good quality white chocolate, chopped (Melting wafers are easiest, but good white chocolate tastes amazing!)
- 1 tablespoon coconut oil or shortening (Optional, helps with smooth melting and coating!)
- Holiday sprinkles (The more festive, the better!)
- Extra powdered sugar (For dusting, if you like that snowy look!)
👩🍳 HOW TO COOK!
- Cookie Crushing Time! Grab those sugar cookies! You need to crush them into fine crumbs. You can do this by throwing them into a food processor and pulsing until they’re like fine sand. No food processor? No problem! Stick them in a Ziploc bag, seal it up, and smash ’em with a rolling pin or the bottom of a heavy glass. You’ll hear that satisfying crunch as they break down—it’s surprisingly therapeutic! You’re aiming for about 2 cups of crumbs.
- Mix the Magic! In a large bowl, combine your softened cream cheese, powdered sugar, vanilla extract, and that tiny pinch of salt. Beat it with an electric mixer (or a sturdy spoon and some elbow grease!) until it’s super smooth and creamy. It’ll look like a sweet, fluffy cloud!
- Combine & Chill! Now, add your cookie crumbs to the cream cheese mixture. Mix, mix, mix until everything is fully combined and forms a thick, moldable dough. It might look a little crumbly at first, but keep mixing, and it’ll come together into a wonderfully dense dough. Cover the bowl with plastic wrap and chill it in the refrigerator for at least 30 minutes. This makes it much easier to roll!
- Roll ‘Em Up! Once chilled, use a small cookie scoop or a tablespoon to portion out the dough. Roll each portion into a smooth, bite-sized ball, about 1-inch in diameter. They’ll feel nice and firm, ready for their cozy coating. Place the rolled truffles on a parchment-lined baking sheet.
- Second Chill! Pop that baking sheet of rolled truffles back into the refrigerator for at least 1 hour. This ensures they’re nice and firm, making them super easy to dip and preventing them from falling apart in the warm chocolate. Patience, my friends, patience! It’s worth it for that perfect truffle texture!
- Melt the Coating! While your truffles are chilling (again!), get your white melting wafers or chopped white chocolate ready. Melt them in a microwave-safe bowl in 30-second intervals, stirring well after each, until smooth and creamy. (If using coconut oil/shortening, add it in at the beginning.) It should be liquid and glossy, smelling sweet and luxurious. Don’t overheat it, or it’ll get clumpy! I definitely almost burnt mine once trying to rush, learned my lesson!
- Dip & Decorate! Take your chilled truffles out of the fridge. Using a fork or a dipping tool, dip each truffle into the melted white chocolate, ensuring it’s fully coated. Gently tap off any excess chocolate. Immediately place the coated truffle back on the parchment-lined baking sheet. Before the chocolate sets, sprinkle with your favorite festive sprinkles! This is where you can get super creative!
- Final Chill! Once all your truffles are dipped and decorated, pop the baking sheet back into the refrigerator for about 30 minutes, or until the chocolate coating is completely set and firm.
- Serve & Share! Once set, arrange your beautiful Sugar Cookie Truffles on a festive platter. Serve them up and watch them disappear!
📊 NUTRITION & TIPS
Pro-Tips Section: Little Tweaks, Big Results:
- Substitution/Time Saver: If you don’t have plain sugar cookies, plain shortbread cookies or even Nilla Wafers work in a pinch! You might want to add an extra ½ teaspoon of almond extract to the cream cheese mixture for that classic sugar cookie vibe if you’re using plain wafers.
- Essential Technique Tip: Chilling is your absolute best friend when making truffles! Don’t skimp on the chill times—it makes rolling and dipping infinitely easier and gives you that perfect, firm truffle texture.
- Flavor Variations: Feel free to get wild! Add a tiny drop of peppermint extract to the cream cheese mixture for a minty twist, or add a pinch of cinnamon for a spiced sugar cookie truffle. The possibilities are endless!
❓ READERS ASKED, WE ANSWERED
Q: My white chocolate seized up and got clumpy! Help! A: Ugh, that’s the worst! White chocolate can be a finicky beast, I’ve been there! Usually, seizing happens if it gets too hot too quickly (always melt in short bursts!) or if even a tiny drop of water gets into the chocolate (moisture is its enemy!). Make sure your bowl and utensils are completely dry. If it happens again, try adding a teaspoon of vegetable oil or shortening to your melted chocolate and stir vigorously; sometimes this can smooth it out. If it’s too far gone, unfortunately, you might need to start over with fresh chocolate. Don’t worry, it happens to the best of us! Just remember: low and slow is the way to go with melting white chocolate!
Go make some delicious, no-bake magic!
