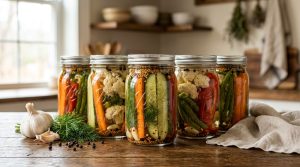
Pickling fresh vegetables is one of the most satisfying traditional preservation techniques you can master at home. Transforming crisp summer produce—such as cucumbers, snap beans, carrots, and cauliflower—into tangy, crunchy, shelf-stable pickles allows you to capture peak seasonality for months to come. This standard hot water bath canning recipe yields vibrant, snappy pickled vegetables packed in a classic aromatic brine spiced with garlic, dill, mustard seed, and black peppercorns.
The secret to exceptional home-pickled vegetables lies in balancing acidity, salt, and heat processing time. Using a verified 1:1 ratio of 5% acidity vinegar to water ensures a safe environment for long-term pantry storage without compromising the snappy bite of the produce. Whether served on a charcuterie board, tucked into sandwiches, or enjoyed as a bright condiment alongside rich main dishes, these canned pickles deliver a brisk, clean acidity and complex spice note that store-bought options rarely match.
Recipe Overview
- Prep Time: 30 minutes
- Cook / Processing Time: 10 minutes
- Total Time: 40 minutes (plus 12 to 24 hours cooling time)
- Yield: 4 pint jars (approx. 16 servings of 1/2 cup each)
- Difficulty: Intermediate
- Equipment Required: 4 pint (16 oz / 473 ml) canning jars with new lids and rings, water bath canner with rack, jar lifter, bubble remover/headspace tool, funnel, non-reactive saucepan (stainless steel or enamel).
Ingredients
For the Vegetable Mix
- Mixed fresh vegetables: 4 lbs (1.8 kg) total, thoroughly washed. Recommended mix:
- 1.5 lbs (680 g) Kirby or Persian cucumbers, trimmed and sliced into 1/4-inch coins or spears
- 1 lb (450 g) carrots, peeled and sliced into sticks or coins
- 1/2 lb (225 g) cauliflower, broken into small bite-sized florets
- 1/2 lb (225 g) green beans or sugar snap peas, trimmed
- 1 medium red bell pepper, seeded and cut into thin strips (optional)
For the Aromatics (Per Pint Jar)
- Garlic: 8 cloves total (2 cloves per jar), peeled and lightly smashed
- Dill seed: 4 teaspoons total (1 teaspoon per jar) OR 8 fresh dill sprigs (2 sprigs per jar)
- Yellow mustard seeds: 2 teaspoons total (1/2 teaspoon per jar)
- Whole black peppercorns: 2 teaspoons total (1/2 teaspoon per jar)
- Crushed red pepper flakes: 1/2 teaspoon total (1/8 teaspoon per jar, optional for subtle heat)
For the Brine
- Vinegar: 3 cups (710 ml) distilled white vinegar or apple cider vinegar (must be standardized to 5% acidity)
- Water: 3 cups (710 ml) filtered water
- Canning salt: 3 tablespoons (54 g) pure canning and pickling salt (do not use iodized table salt)
- Granulated sugar: 2 tablespoons (25 g) white granulated sugar (optional, to round out tartness)
Step-by-Step Instructions
Step 1: Prepare the Canning Equipment
- Inspect four pint canning jars for chips or cracks. Wash jars, brand-new flat lids, and screw bands in hot, soapy water, then rinse thoroughly.
- Place the rack inside your water bath canner, set the clean jars on the rack, and fill both the jars and canner with hot tap water until the jars are completely submerged under 1 to 2 inches of water.
- Cover the canner and heat the water over medium-high heat until it reaches a gentle simmer (around 180°F / 82°C). Keep jars hot in this water until ready to pack.
Step 2: Prepare the Vegetables and Aromatics
- Wash all vegetables thoroughly under cold running water. Slice off and discard 1/16th inch from the blossom ends of cucumbers, as blossom ends contain enzymes that can soften pickles during storage.
- Cut vegetables into uniform spears, coins, or bite-sized pieces so they pack tightly and process evenly.
Step 3: Brew the Pickling Brine
- In a large non-reactive saucepan (stainless steel or enamel-coated), combine 3 cups of 5% acidity vinegar, 3 cups of water, 3 tablespoons of canning salt, and 2 tablespoons of sugar (if using).
- Bring the brine to a rolling boil over medium-high heat, stirring until the salt and sugar are completely dissolved. Reduce heat to low and keep the brine at a gentle simmer while packing jars.
Step 4: Pack the Jars
- Using a jar lifter, remove one hot jar from the canner, pouring the water back into the pot. Set the hot jar on a clean kitchen towel placed on the counter.
- Add aromatics directly into the bottom of the jar: 2 smashed garlic cloves, 1 teaspoon dill seed (or 2 dill sprigs), 1/2 teaspoon mustard seeds, 1/2 teaspoon peppercorns, and 1/8 teaspoon red pepper flakes (if using).
- Pack the prepared raw vegetables tightly into the jar, arranging spears vertically or layering mixed coins and florets. Pack firmly without crushing the produce, leaving top space.
- Place a canning funnel over the jar and ladle the hot brine into the jar, leaving exactly 1/2 inch (1.25 cm) of headspace between the top of the brine and the rim of the jar.
Step 5: Debubble, Wipe, and Seal
- Slide a non-metallic bubble remover tool or plastic chopstick down the inside walls of the jar to release trapped air bubbles. Recheck headspace; add a splash of extra hot brine if necessary to maintain 1/2 inch headspace.
- Wipe the top rim and outer threads of the jar thoroughly with a clean, damp paper towel to remove any brine residue or salt grains that could prevent a vacuum seal.
- Center a fresh flat lid over the jar rim, then screw the metal band down until it is “fingertip tight”—tightened gently with your fingers until resistance is met, without forcing it shut.
- Repeat the packing and sealing process for the remaining three jars.
Step 6: Water Bath Processing
- Use the jar lifter to lower the filled jars upright into the canner. Ensure the jars are completely covered by at least 1 to 2 inches of boiling water. Add extra boiling water from a kettle if needed.
- Cover the canner with its lid and bring the water to a full, rolling boil over high heat.
- Once the water reaches a continuous rolling boil, start your timer and process pint jars for 10 minutes (adjust timing for higher elevations as noted in the tips section).
Step 7: Cool and Check Seals
- When the processing time is complete, turn off the heat, remove the canner lid, and allow the jars to settle in the hot water for 5 minutes.
- Use the jar lifter to carefully remove jars without tilting them. Place them upright onto a dry towel-lined countertop, leaving 1 to 2 inches of space between jars for air circulation.
- Allow jars to sit undisturbed at room temperature for 12 to 24 hours. You will hear distinct pinging sounds as vacuum seals form.
- After 12 to 24 hours, test the seals by pressing down on the center of each lid. If the lid is firm and flat with no flex or popping sound, the jar is properly sealed. Remove screw bands, wipe jars clean, and label with contents and date.
Expert Tips for Success
- Maintain Acidity Safety: Never alter the ratio of vinegar to water. Safe home water-bath canning requires a minimum 5% acidity level in the vinegar to prevent bacterial growth. Use commercially bottled white or cider vinegar clearly labeled with 5% acidity.
- Choose Non-Iodized Salt: Standard table salt contains anti-caking agents and iodine, which cause cloudy brine and dark, discolored pickles. Always use dedicated canning and pickling salt or pure, additive-free coarse sea salt.
- Keep Vegetables Firm: Select firm, freshly harvested produce. Adding tannin-rich leaves (such as a clean grape leaf, oak leaf, or horseradish leaf) to the bottom of each jar helps retain crispness. Crispness enhancers like calcium chloride (Pickle Crisp) can also be used according to package directions.
- Altitude Adjustment: Processing times listed apply to elevations under 1,000 feet (305 meters). Increase processing time based on your altitude:
- 1,001 to 3,000 ft: Add 5 minutes
- 3,001 to 6,000 ft: Add 10 minutes
- Above 6,000 ft: Add 15 minutes
Substitutions and Variations
- Spiced Curry Pickles: Replace mustard seed and dill with 1/2 teaspoon yellow curry powder, 1/4 teaspoon cumin seeds, and sliced fresh ginger in each jar for an aromatic twist.
- Sweet & Tangy Bread-and-Butter Style: Increase sugar in the brine to 1 cup (200 g) and add 1/2 teaspoon celery seed and 1/2 teaspoon ground turmeric to the brine mixture.
- Herbal Dill Blend: Substitute fresh dill weed sprigs with fresh tarragon, thyme, or oregano for pickling green beans, pearl onions, or baby carrots.
- Vinegar Choice: White distilled vinegar provides a sharp, neutral acidity that keeps vegetable colors bright. Apple cider vinegar yields a slightly rounder, mellower flavor with a warm golden tint. Both are fully interchangeable as long as they carry 5% acidity.
Storage Guidance
- Canned Pantry Storage: Properly sealed, heat-processed jars can be stored in a cool, dark, dry location (such as a pantry or cabinet) between 50°F and 70°F (10°C–21°C) for up to 12 to 18 months. For optimal flavor and texture, cure the jars for at least 3 to 4 weeks before opening.
- Refrigeration After Opening: Once a jar’s seal is broken, store it tightly closed in the refrigerator and consume within 3 to 4 weeks. Always use clean utensils to remove pickles from the brine.
- Unsealed Jars: Any jar that fails to seal within 24 hours should be stored in the refrigerator immediately and consumed within 3 weeks as a fresh refrigerator pickle. Alternatively, re-process with a fresh lid within 24 hours.
Nutrition Information
Note: Nutrition values are estimates per serving (approx. 1/2 cup / 80g of mixed pickled vegetables, drained) and may vary based on exact vegetable selection.
- Calories: 25 kcal
- Total Fat: 0.2g
- Saturated Fat: 0g
- Sodium: 380mg
- Total Carbohydrates: 5g
- Dietary Fiber: 1.5g
- Sugars: 2.5g
- Protein: 1g
Frequently Asked Questions
Why are my pickled vegetables soft instead of crunchy?
Softness usually results from blossom-end enzymes on cucumbers, using soft or old produce, over-processing in the water bath, or using brine with lower acidity than recommended. Always trim cucumber blossom ends and process promptly at accurate temperatures.
Can I safely reduce the salt in this pickling recipe?
In standard vinegar-based home canning recipes with 5% acidity, salt functions primarily as a flavoring agent rather than a safety preservative (unlike in fermented pickles). You can reduce salt slightly if necessary, though texture and traditional pickling flavor may be altered.
My garlic turned blue or green in the jar. Is it safe to eat?
Yes, garlic turning blue or green is a harmless chemical reaction between naturally occurring sulfur compounds in the garlic and trace minerals or acids in the vinegar. It is entirely safe to consume.
Can I reuse store-bought jar lids for canning pickles?
No. Standard mason jar flat lids feature a single-use sealing compound designed to form a vacuum seal once. Reusing old lids leads to high seal failure rates. Always use new flat lids for thermal processing, though outer screw bands can be reused if free of rust and dents.
Serving Suggestions
These crisp, tangy pickled vegetables add bright acidity to any meal. Arrange them on a charcuterie board alongside sharp cheeses, cured meats, and warm crusty bread. They pair remarkably well with rich, savory mains or seasonal salads such as a fresh apple cranberry walnut salad or a vibrant orange pomegranate salad. For a warm dinner spread, serve these bright pickles as a palate cleanser alongside roasted side dishes like sticky maple-glazed Brussels sprouts or grilled meats.